If your Xbox controller malfunctions or some dust particle enters the interior of the Xbox One controller, you need to teardown the Xbox to fix those issues but don’t know how to take apart Xbox One controller. Worry not in this article I’ll show you how you can open an Xbox controller easily at your home. So, let’s start with ‘how to take apart Xbox One controller safely with few easy steps’.
Things To Know Before Take Apart Xbox One Controller
Before knowing how to take apart Xbox One controller, you must check and look for these things.
- Get a T-8 safety Trox to teardown Xbox. It is certified and a reliable tool kit to open an Xbox controller.
- Don’t forget to remove the batteries before starting the teardown process.
- When you have access to the interior of the Xbox One controller, make sure to clean it before reassembling the parts.
- Remove the analog stick, the D-pad, and the ring of the D-pad.
Now you are ready to learn How to take apart a Xbox One controller by yourself.
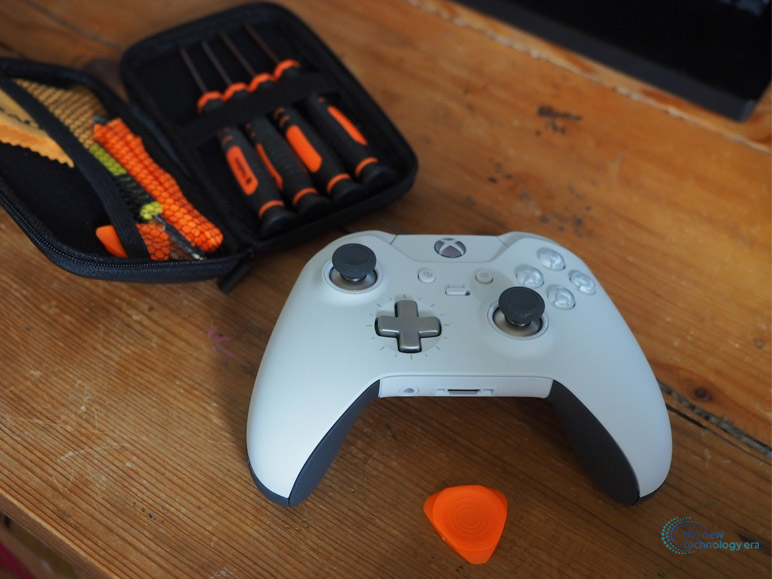
List Of Tools That Will Help You To Take Apart Xbox Controller
If you want to learn ‘how to take Xbox One controller apart’ then you need some tools that will help you to apart the Xbox One controller easily and without damaging the controller. Here are the tools that you need before reading my ‘How to take apart Xbox One controller’ section in this article.
- You need a T8 or a T9 Trox screwdriver.
- A screwdriver that is flathead.
- A slick object like a credit/metro card, guitar plectrum, etc.
- A plastic or metal spudger.
These are the essential tools to remove the top part of the Xbox One controller and teardown the interior of the controller safely.
How To Open A Xbox One Controller?
Now you are going to learn ‘How to take apart Xbox One controller safely’. I hope you understand the above section and have the necessary tools to get started. So here is the step-by-step guide to opening an Xbox One controller.
Step 1
Remove the covers of the batteries. Just open the battery compartment by sliding the battery cover located on the back of your Xbox controller. Once the battery cover opens up, remove the batteries from it.
Step 2
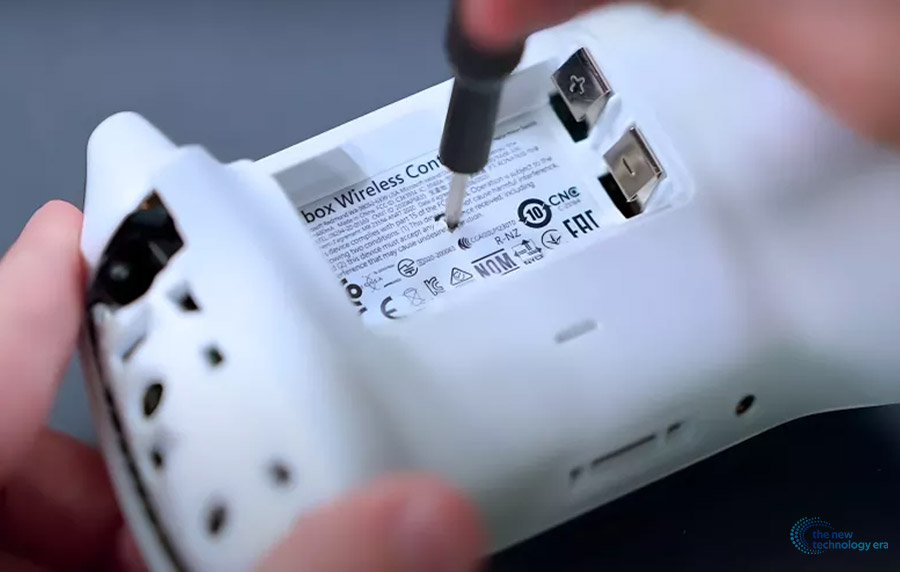
You’ll see a sticker placed underneath the batteries. Peel the sticker off from the controller. Remember this will affect your warranty of your controller. There you noticed a screw underneath the sticker. With the help of a screwdriver remove that screw. Now you have successfully removed the first screw of the Xbox controller.
Step 3
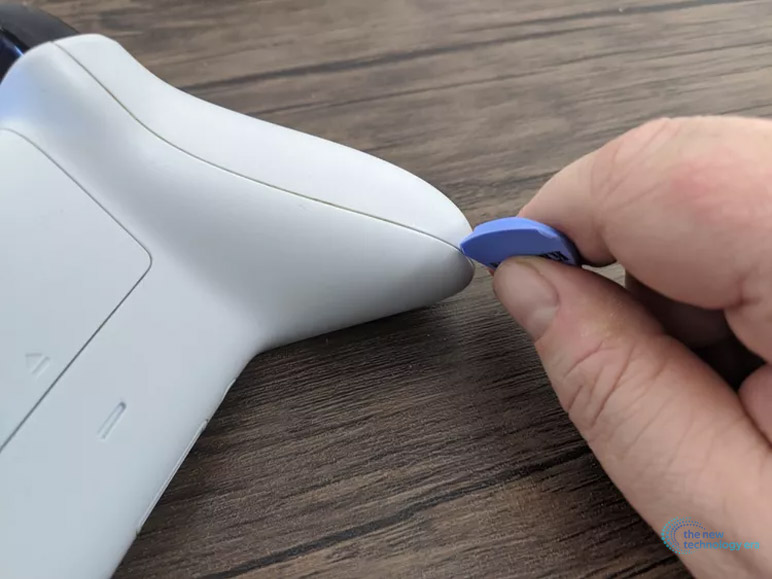
After that, remove the plastic handle grip covers that are placed on the back of the handles. There you need the spudger or similar object that you can slide into the gap to loosen the plastic covers of the handles. Then remove the covers carefully.
Step 4
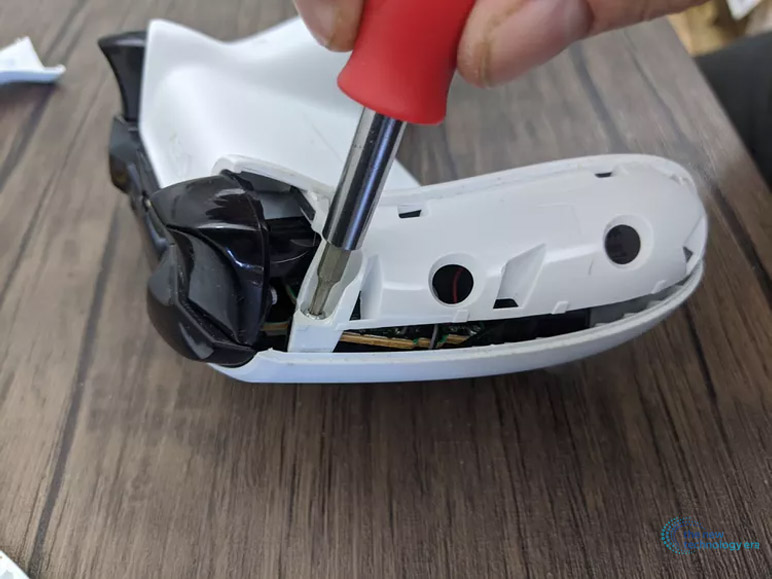
Once you remove the plastic handles, Now pick up the T-8 screwdriver and unscrew the screws that are placed in the back of the controller. This is an important part of our lesson ‘How to take apart an Xbox One controller’. Remove carefully 4 screws from the back of the Xbox One controller.
Step 5
Make sure to remove all 5 screws one is the first screw that is located in the back of the battery compartment beneath the sticker, two are at the bottom of the plastic panel, and the other two are placed at the sides of your controller. After removing the screws gently use the spudger to remove the front plastic panel. You also remove the thumbsticks because the front panel is not holding it anymore.
Step 6
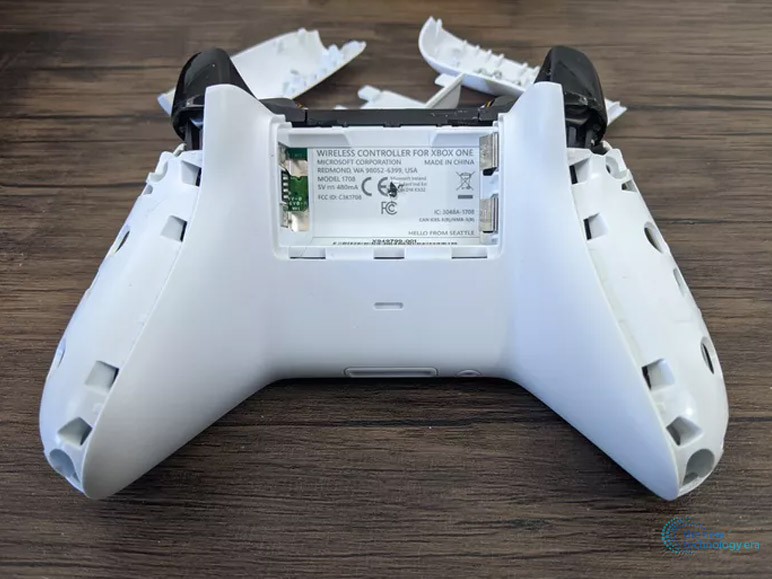
After removing the faceplate delicately giggle the controller to remove the back panel of your Xbox One controller. Now you have successfully completed 90% of your lesson on how to take apart the Xbox One controller.
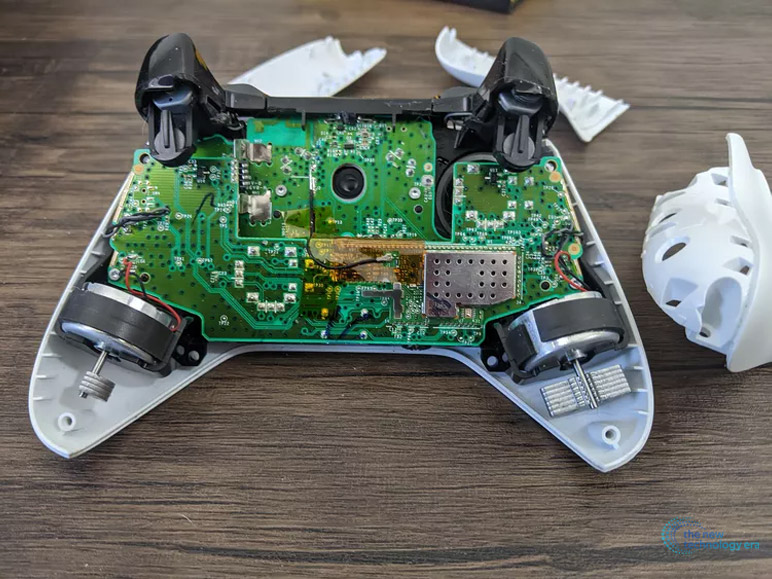
Step 7
Now this is a very important and delicate part to remove, is the circuit board of the Xbox One controller. First, pull up the wireless connect button and the D-pad. Then remove two screws from the circuit board that helps the circuit board to stay in its place.
Now you have successfully learned how to take apart Xbox One controller at home. You can now remove the vibration motors and other buttons from the plastic board.
How To Reassemble The Xbox One Controller?
You perform the teardown process by reading my how-to take-apart Xbox One controller steps, but what about reassembling the Xbox One controller? For that follow these steps.
Step 1
First, resemble the buttons that you take apart from the controller, then just place the circuit board and attach it to the frame with the help of the Torx screwdriver, screw the two screws.
Step 2
Attach the back case and screw the 4 screws. and then put the plastic handles in their place. Then tightly fit the handles to the back panel by pressing the handles.
Step 3
Insert the front panel by tightly pressing the panel to the controller and put back the rubber thumbstick before placing the front panel.
Step 4
Lastly, insert and tighten the screw that you removed from the back of the battery chamber. Then just insert the batteries. Reassembling is the reversed process of the teardown process.
Conclusion
In the end, you have learned how to take apart Xbox One controller at home easily but make sure to take care of the delicate interior parts and don’t lose the screws. If you have any questions regarding this topic then feel free to ask me in the comment section.
Also Read:
- Asus ROG Strix G15 Advantage Edition
- Xbox Refund: How To Refund A Game On Xbox?
- How To Connect Xbox Controller To iPhone?
- Google’s Duet AI To Snapchat Dreams